Hexo-NexT 后续优化
在blog\source\js文件夹下创建funny_title.js,添加如下代码:
/* 离开当前页面时修改网页标题,回到当前页面时恢复原来标题 */
window.onload = function () {
  let OriginTitle = document.title;
  let titleTime;
  document.addEventListener('visibilitychange', function () {
    if (document.hidden) {
      document.title = '╭(°A°`)╮ 页面崩溃啦 ~';
      clearTimeout(titleTime);
    } else {
      // $('[rel="icon"]').attr('href', "/images/favicon-32x32.png"); 替换网站icon图标(可选)
      document.title = '(ฅ>ω<*ฅ) 噫又好了鸭~' + OriginTitle;
      titleTime = setTimeout(function () {
        document.title = OriginTitle;
      }, 4000);
    }
  });
};在head.njk文件中,添加引用:
<!-- 搞怪欺骗 -->
<script type="text/javascript" src="/js/funny_title.js"></script>1.打开blog\source\_data\sidebar.njk文件,加入以下代码:
{% if theme.recent_posts.enable %}
    <div class="links-of-blogroll">
      <div class="links-of-blogroll-title">
		<!-- 选择合适的icon -->
		{%- if theme.recent_posts.icon %}<i class="{{ theme.recent_posts.icon }}" aria-hidden="true"></i>{%- endif %}
        {{ theme.recent_posts.description }}
      </div>
      <ul class="links-of-blogroll-list">
		<!-- 文章排序规格,-updated 按照文章更新时间倒排 -->
        {% set posts = site.posts.sort('-updated').toArray() %}
		 <!-- 显示四条近期文章 -->
        {% for post in posts.slice('0', '4') %}
          <li>
            <a href="{{ url_for(post.path) }}" title="{{ post.title }}" target="_blank">{{ post.title }}</a>
          </li>
        {% endfor %}
      </ul>
    </div>
{% endif %}
2.打开主题配置文件,在最后添加如下内容:
# 近期文章配置
recent_posts:
enable: true
icon: fas fa-history
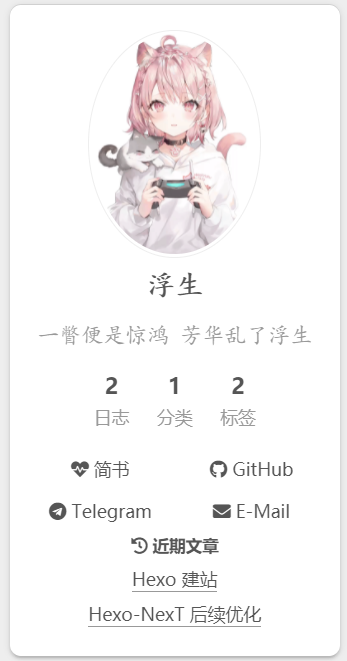
description: 近期文章重启博客效果如下:
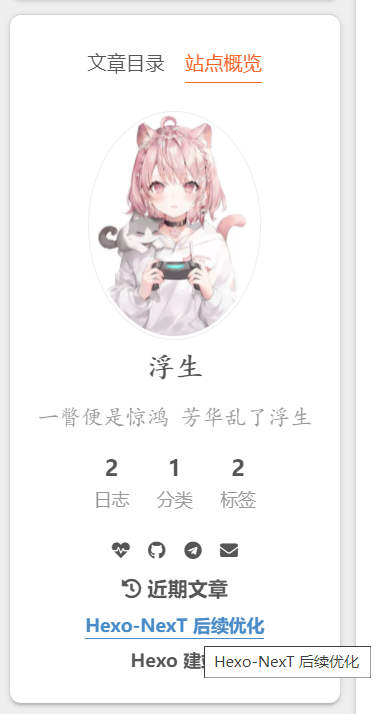
有点low,开始美化
3.1.打开主题配置文件,搜索social_icons选项,进行如下修改:
social_icons:
  enable: true # 显示社交图标
  icons_only: true # 只显示社交图标
  transition: true # 过渡动画
3.2.打开 blog\source\_data\variables.styl 定义颜色:
$recent-articles-link = #428bca;3.3.打开blog\source\_data\styles.styl文件,加入如下样式:
.links-of-blogroll-title {
  font-size: $font-size-large;
}

.links-of-blogroll-list a {
  font-weight: bold;
  border-bottom: none;

  &:hover {
    color: $recent-articles-link;
    font-weight: bold;
    border-bottom: 1px solid $recent-articles-link;
  }
}
优化后效果如下:
这里通过文章模板进行实现:
---
title: Hexo美化
date: 2019-12-19
categories:
- Hexo
tags:
  - study
---
<img src="/img/haha.png" width = "900" height = "600" alt="git" align=center />
摘要内容......
<!-- more -->
以下为隐藏内容1.在blog\source\js下新建click-love.js,接着把如下代码拷贝粘贴到click-love.js文件中。
!function(e,t,a){function n(){c(".heart{width: 10px;height: 10px;position: fixed;background: #f00;transform: rotate(45deg);-webkit-transform: rotate(45deg);-moz-transform: rotate(45deg);}.heart:after,.heart:before{content: '';width: inherit;height: inherit;background: inherit;border-radius: 50%;-webkit-border-radius: 50%;-moz-border-radius: 50%;position: fixed;}.heart:after{top: -5px;}.heart:before{left: -5px;}"),o(),r()}function r(){for(var e=0;e<d.length;e++)d[e].alpha<=0?(t.body.removeChild(d[e].el),d.splice(e,1)):(d[e].y--,d[e].scale+=.004,d[e].alpha-=.013,d[e].el.style.cssText="left:"+d[e].x+"px;top:"+d[e].y+"px;opacity:"+d[e].alpha+";transform:scale("+d[e].scale+","+d[e].scale+") rotate(45deg);background:"+d[e].color+";z-index:99999");requestAnimationFrame(r)}function o(){var t="function"==typeof e.onclick&&e.onclick;e.onclick=function(e){t&&t(),i(e)}}function i(e){var a=t.createElement("div");a.className="heart",d.push({el:a,x:e.clientX-5,y:e.clientY-5,scale:1,alpha:1,color:s()}),t.body.appendChild(a)}function c(e){var a=t.createElement("style");a.type="text/css";try{a.appendChild(t.createTextNode(e))}catch(t){a.styleSheet.cssText=e}t.getElementsByTagName("head")[0].appendChild(a)}function s(){return"rgb("+~~(255*Math.random())+","+~~(255*Math.random())+","+~~(255*Math.random())+")"}var d=[];e.requestAnimationFrame=function(){return e.requestAnimationFrame||e.webkitRequestAnimationFrame||e.mozRequestAnimationFrame||e.oRequestAnimationFrame||e.msRequestAnimationFrame||function(e){setTimeout(e,1e3/60)}}(),n()}(window,document);如没有 js 目录直接新建一个即可,这里只是为了后期统一进行管理。
2.在 blog\source\_data\body-end.njk 文件中加入如下代码:
{##########################}
{### PAGE CLICK EFFECTS ###}
{##########################}
{% if theme.click_love.enable %}
    <script type="text/javascript" src="/js/click-love.js"></script>
{% endif %}
body-end.njk文件需要在主题配置文件的custom_file_path选项中取消注释
3.在主题配置文件(一般是最后一行)启用配置:
# 页面点击爱心特效
click_love:
enable: true 找到 body-end.njk 文件,加入以下内容:
<div class="bg_content">
  <canvas id="canvas"></canvas>
</div>
{% if theme.canvas %}
   <script type="text/javascript" src="/js/dynamic_bg.js"></script>
{% endif %}在blog\source\js中新建文件dynamic_bg.js,代码链接中可见:dynamic_bg.js
在 styles.styl 文件末尾添加如下内容:
.bg_content {
  position: fixed;
  top: 0;
  z-index: -1;
  width: 100%;
  height: 100%;
}在主题配置文件中添加canvas: true启用刚才的配置。
灯箱功能,实现点击图片后放大聚焦图片,并支持幻灯片播放、全屏播放、缩略图、快速分享到社交媒体等,该功能由 fancyBox 提供。
在主题配置文件中搜索 fancybox设置为true。
# FancyBox is a tool that offers a nice and elegant way to add zooming functionality for images.
# For more information: https://fancyapps.com/fancybox
fancybox: true在主题配置文件中,开启配置:
busuanzi_count:
  enable: true # 开启不蒜子访问统计,默认是false
  total_visitors: true # 站点总访问量
  total_visitors_icon: fas fa-user # icon皆为对应图标
  total_views: true # 所有页面的总浏览量
  total_views_icon: fas fa-eye
  post_views: false # 文章浏览量
post_views_icon: far fa-eye默认效果只有图标,不是特别直观,打开styles.styl文件添加如下代码:
/* footer-不蒜子统计 */
.busuanzi-count .post-meta-item:nth-child(1) {
  &::before {
    content: '访客数'
  }
  &::after {
    content: '人次'
  }
}

.busuanzi-count .post-meta-item:nth-child(2) {
  & .post-meta-item-icon::before {
    content: '总访问量'
  }
  &::after {
    content: '次';
  }
}
最终效果:

1.在footer.njk文件中加入以下代码:
<div id="website-time" class="{{ 'website-time-dynamic' if theme.website_running_time.style == 'dynamic' else 'website-time-static' }}"></div>
2.在body-end.njk文件中加入以下代码:
{############################}
{### WEBSITE RUNNING TIME ###}
{############################}
{% if theme.website_running_time.enable %}
<script type="text/javascript" id="website-js" src="/js/website.min.js" code="all"></script>
{% endif %}3.在blog\source\js下新建website.js加入倒计时:
window.onload = function () {
    siteTime();
}
function siteTime() {
    const seconds = 1000;
    const minutes = seconds * 60;
    const hours = minutes * 60;
    const days = hours * 24;
    const years = days * 365;
    const today = new Date();
    const todayYear = today.getFullYear();
    const todayMonth = today.getMonth() + 1;
    const todayDate = today.getDate();
    const todayHour = today.getHours();
    const todayMinute = today.getMinutes();
    const todaySecond = today.getSeconds();
    /* Date.UTC() -- 返回date对象距世界标准时间(UTC)1970年1月1日午夜之间的毫秒数(时间戳)
    year - 作为date对象的年份,为4位年份值
    month - 0-11之间的整数,做为date对象的月份
    day - 1-31之间的整数,做为date对象的天数
    hours - 0(午夜24点)-23之间的整数,做为date对象的小时数
    minutes - 0-59之间的整数,做为date对象的分钟数
    seconds - 0-59之间的整数,做为date对象的秒数
    microseconds - 0-999之间的整数,做为date对象的毫秒数 */
    const t1 = Date.UTC(2017, 1, 4, 0, 0, 0, 0); //建站时间
    const t2 = Date.UTC(todayYear, todayMonth, todayDate, todayHour, todayMinute, todaySecond);
    const diff = t2 - t1;
    const diffYears = Math.floor(diff / years);
    const diffDays = Math.floor((diff / days) - diffYears * 365);
    const diffHours = Math.floor((diff - (diffYears * 365 + diffDays) * days) / hours);
    const diffMinutes = Math.floor((diff - (diffYears * 365 + diffDays) * days - diffHours * hours) / minutes);
    const diffSeconds = Math.floor((diff - (diffYears * 365 + diffDays) * days - diffHours * hours - diffMinutes * minutes) / seconds);
    $('#website-time').html(" Run for " + diffYears + " Year " + diffDays + " Days " + diffHours + " Hours " + diffMinutes + " m " + diffSeconds + " s");

    window.setTimeout(siteTime, 1000);
}4.在styles.styl文件中给倒计时添加样式:
.website-time-static {
  color: transparent;
  -webkit-background-clip: text;
  background-image: -webkit-linear-gradient(left, #aa4b6b, #6b6b83, #3b8d99);
}

.website-time-dynamic {
  color: transparent;
  background-size: 300% 100%;
  -webkit-background-clip: text;
  animation: general-animation 36s infinite linear;
  background-image: linear-gradient(to right, #077dcc 0%, #f47920 10%, #d71345 20%, #ff2a2a 30%, #7e36ff 40%, #077dcc 50%, #f47920 60%, #d71345 70%, #f7acbc 80%, #ffd400 90%, #077dcc 100%);
}
5.在主题配置文件中启用配置
# 网站运行时间
website_running_time:
  enable: true
  # 默认 static 可选 dynamic
style: dynamic首先在Hexo目录下的scripts目录中创建一个JavaScript脚本文件。
如果没有这个scripts目录,则新建一个。
scripts目录新建的JavaScript脚本文件可以任意取名。
通过这个脚本,我们用其来监听hexo new这个动作,并在检测到hexo new之后,执行编辑器打开的命令。
如果你是windows平台的Hexo用户,则将下列内容写入你的脚本:
var spawn = require('child_process').exec;
hexo.on('new', function(data){
  spawn('start  "markdown编辑器绝对路径.exe" ' + data.path);
});
如果你是Mac平台的Hexo用户,则将下列内容写入你的脚本:
var exec = require('child_process').exec;
hexo.on('new', function(data){
    exec('open -a "markdown编辑器绝对路径.app" ' + data.path);

});
文章加密
使用插件:hexo-blog-encrypt
1.在博客根目录执行安装命令
npm install hexo-blog-encrypt --save2.在站点配置文件中加入以下内容:
# Security
encrypt:
  abstract: 本文章已加密🐇, 请输入密码查看.
  message: ( ⓛ ω ⓛ *), 请在此处输入密码,查看加密内容.
  wrong_pass_message: 抱歉, 这个密码看着不太对, 请再试试.
wrong_hash_message: 抱歉, 这个文章不能被校验, 不过您还是能看看解密后的内容. 3.在需要加密的文章Front-matter里加入password: 访问密码即可。
已知问题,解密后初次访问文章,极小部分布局错乱,代码块复制功能失效。刷新页面都可解决。更多高阶用法自行查阅官方文档。